
Knowledge Blog · Print technologies


The story is much the same in plenty of production areas: white streaks appear in the print image, the scanner no longer reads the codes cleanly, and the printhead is replaced. A short while later the same thing happens again. By the third head within a few months, the obvious question is where the cause actually lies.
Almost always, it lies in the operating conditions. A thermal printhead is a precision component under thermal, mechanical and chemical load every time it prints — and each of those loads can be managed to a degree. Once you understand which mechanisms wear a printhead out, you can take pressure off your own application in a targeted way. This article describes those mechanisms, shows how to tell a contamination problem from genuine damage, and sets out the levers you can move while the line keeps running.
Why you will not find a lifespan figure here
There is no reliable general answer to the question “How long does a printhead last?”, and that in itself is the first useful piece of information. The same printhead design can reach several times the service life in a clean environment with sensible settings and regular cleaning that it manages in a dusty hall with poor cleaning and the wrong settings. The spread is so wide that a single figure misleads more than it helps.
What matters in practice is not the absolute service life but where your own application sits within that spread, and which factors are pulling it toward the lower end.
This also answers the question that usually follows: “But the head is only a few months old.” Time in service says nothing about load. What tells you something is how much material has run beneath the printhead and what kind, which settings were used, and the conditions the machine works in.
What actually wears out in a printhead
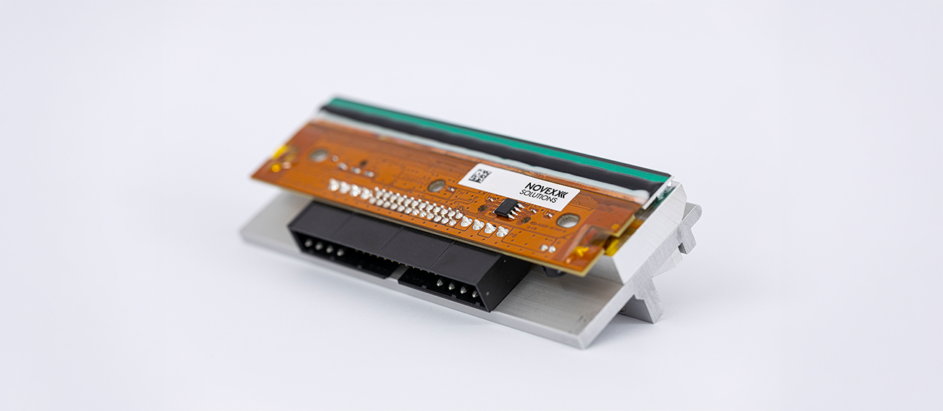
A thermal printhead is a narrow bar carrying a row of individually controlled heating elements, known as dots. In thermal transfer printing, each element heats a precisely defined spot on the back of a ribbon and transfers the ink layer onto the label. In direct thermal printing there is no ribbon; the heat triggers a color change directly in a coated material surface. According to printhead manufacturers, the heating elements measure a few tens of micrometers, briefly reach several hundred degrees Celsius and are switched in microseconds.
A very thin protective coating sits above the heating elements. It absorbs the entire mechanical load created as ribbon and label material slide across the surface under head pressure. This coating is the part that actually wears: as long as it is intact, the heating elements are protected. Once it has been worn away in one spot, the delicate structures underneath are exposed and failure follows quickly.
The second wear component is the platen roller, the counter-pressure roller beneath the printhead. It creates even contact across the full print width and transports the material. If it wears unevenly, collects adhesive or picks up hard particles, that feeds straight back into the printhead. Printhead and platen roller are a pair and should always be assessed together.
The design of the head matters too. On a flat head, the heating line sits on the face of the bar. On near edge and corner edge heads — two designs that are technically very similar — it sits on the edge of the carrier, which changes material routing, run-in behavior and how readily contamination builds up. For the wear mechanisms themselves it makes no difference whether the head works in a desktop printer, in a Print & Apply system integrated into a line, or in a thermal transfer overprinter printing directly onto packaging film. The technology is the same; what differs is the design, the load profile and how easily the head can be reached for cleaning.
Four main reasons printheads fail

Overheating of individual heating elements
If a heating element is driven for a prolonged period with more energy than it can dissipate in time, it overheats and wears at an accelerated rate. Eventually it fails, and a white line appears in the print direction.
Three causes are typical. First, an energy level set too high — persistently high darkness values, dense black areas in the layout and high output volumes in combination, made worse when no temperature reduction is configured. Second, blocked heat dissipation: residue on the surface acts as an insulating layer and heat builds up in the element. That includes residue from unsuitable cleaning agents or marks left by contact with the heating line. Third, a poorly matched combination of ribbon and label material, or a cold environment in which both need more energy for a clean transfer.
Abrasion and residue
Here the protective coating wears away prematurely. As soon as it has gone in one place, the heating elements are unprotected and mechanical damage to them follows.
The causes are abrasive material surfaces, a missing or insufficient ribbon overhang beyond the label width, friction between printhead and platen roller when the setup is wrong, and dirt and residue acting as an abrasive. Cleaning itself belongs in this category too: the wrong tool does more damage in seconds than weeks of normal operation.
Mechanical damage
Mechanical damage happens in an instant and cannot be undone. Typical causes are touching the heating line with bare hands, soiled gloves or tools, knocks and drops during removal and refitting, inadequate transport protection, hard particles in the label material or ribbon, and attempts to scrape residue off mechanically.
One route is regularly underestimated: a hard particle can press itself into the rubber surface of the platen roller and stay there. From then on it acts on the same area of the printhead with every revolution. Replace the head and the same damage returns — until the roller is inspected and cleaned or replaced.
Electronic failure
A thermal printhead is an electronic component and correspondingly sensitive to electrostatic discharge, corrosion and overvoltage. Electrostatic discharge is particularly treacherous because it leaves no visible trace and its consequences only show up in the print image later.
The risk is highest when connectors are plugged or unplugged with the machine switched on, when the head is handled without discharging your own body first, in the presence of moisture and condensation, and when cleaning fluid is applied so generously that it reaches areas where it has no business being.
Diagnose first, replace second
The most expensive mistake in practice is replacing a printhead that was still sound. A simple sequence helps: clean thoroughly, run a test print, and compare the result with the previous one. If the fault disappears, it was contamination. If it stays in exactly the same place, there is damage in exactly that place.
| Print fault | Likely causes | First action | How to tell them apart |
|---|---|---|---|
| Narrow white line, always in the same place | Residue on the heating line; damaged heating element; broken supply track to an element | Clean thoroughly without scratching the surface | If the line survives cleaning, that area is damaged. With contamination the edge of the white line is usually less sharply defined than with a defect |
| Wide dropout several millimeters across | Several damaged heating elements; mechanical damage | Visual inspection for mechanical impact | A reproducible dropout of consistent width argues against contamination |
| Pale print across the whole width | Residue across the full width; poorly matched ribbon and material; incorrect mechanical printhead setup; insufficient energy input | Clean, then check consumables and settings before turning the darkness up | A fresh ribbon and a cleaned head will show whether the consumables were the cause |
| Black line in the print direction | Short circuit in the supply track to a heating element | Switch the machine off, document the fault, involve qualified personnel | Cleaning makes no difference to the image |
Table 1: print faults at the thermal printhead and how to tell them apart.
Two points on diagnosis. First, keep the test print and write the date on it. How the fault develops over several weeks tells you far more than a single snapshot. Second, judge readability with the reader that will scan the code later, not by eye. A print image that looks perfectly fine to a person can already sit outside tolerance for the scanner.
The four levers you control in production
Those four failure modes can be influenced in daily operation through four levers: the energy applied, the consumables, how you handle the surrounding conditions, and the mechanics. Cleaning and careful handling of the printhead come on top of that — both important enough to have a section of their own.
Energy input: as little as possible
The principle is simple: use the lowest setting that still produces a reliably readable result. A higher darkness value does not create a better print image, only more thermal load — and that acts directly on service life.
Darkness, speed and layout are connected. Higher speed shortens the dwell time under the printhead and tends to demand more energy; reducing speed moderately improves fine detail and eases the load on the head at the same time. A layout with large black areas puts more strain on the head than a sparing one, without readability gaining anything from it.
One function helps here if your machine offers it: temperature compensation automatically lowers the energy level as the head warms up during a longer print job. It keeps the print image consistent and caps the thermal peak load.
A common mistake in daily operation
The print image gets paler, the operator raises the darkness setting, the image looks fine again — and the cause, contamination, is still there. The additional energy now accelerates exactly the wear whose symptom it is hiding. An apparent need to adjust print parameters is therefore a good reason to check the cleaning routine first.
Consumables: the single most important factor
What runs beneath the printhead affects its service life more than any setting. Four points matter:
- Ribbon and label material have to suit each other. A combination that makes transfer harder forces up the energy and with it the wear — even if the result looks acceptable at first glance.
- The ribbon needs a suitable back coating. It reduces friction and dissipates static charge. Neither is an optional extra; both are a basic requirement for quality ribbons in industrial use, and the coating should be specified for the printhead design, the label material and the speed you actually run.
- The ribbon must overhang the label on both sides. If the label runs wider than the ribbon, the material edge — and often adhesive with it — sits directly on the heating line. That is one of the quickest ways to damage a printhead surface.
- Finally, the printing method itself. In direct thermal printing there is no ribbon acting as a buffer; the material surface slides straight across the printhead, and coated direct thermal materials leave additional residue behind. Both shorten service life considerably compared with thermal transfer printing, which is why more wear-resistant printhead variants are offered for direct thermal applications on corner edge systems. If you work in direct thermal mode permanently, it is worth checking whether such a variant is available for your configuration.
Environment: the factor most often overlooked
The benchmark is always the ambient specification of the machine in use. If those limits are exceeded permanently, expect shorter service life — no matter how carefully everything else is set up.
Dust is the classic. Fine particles work their way between material and printhead, act as an abrasive and speed up contamination. In dusty areas, a combination helps: clean more frequently, keep the cover closed between jobs and, where possible, position the printer somewhere sheltered.
Cold has a double effect. Cold material and cold ribbon transfer poorly, the print image goes pale — and the obvious remedy, turning the darkness up, increases the load at precisely the moment the head is already working under unfavourable conditions. It makes far more sense to store and run printer and consumables within the machine's specified range and feed labels to the line from there.
Moisture and condensation are the most critical path of all, because they can cause immediate failure. When a machine or a printhead is moved from a cold environment into a warm one, moisture can form on the surface. Switching on in that state risks corrosion and short circuits. The rule is straightforward: wait until temperatures have equalized and everything is completely dry, and only then switch on.
Mechanics: setup and platen roller
Head pressure and parallel contact determine whether the printhead touches the material evenly across the full width. Too little pressure gives pale print and poor energy transfer from the head; too much accelerates wear on both head and roller.
The platen roller should be inspected regularly as well. Grooves, hardened or glazed surfaces, adhesive build-up and flat spots lead to uneven transport and uneven counter-pressure — symptoms that are frequently blamed on a faulty printhead. As a rule: when a printhead reaches the end of its useful life, inspect the roller at the same time. A new head on a worn roller loses its advantage quickly.
One function helps reduce wear on both head and platen roller, if your machine offers it and the application allows it: an automatic head lift takes the printhead off the material surface in areas where nothing is printed.
Cleaning: interval, agent and technique
Cleaning offers the best ratio of effort to effect — and it is also the task most often done irregularly. It takes a few movements per roll change, which is why it deserves a fixed place in the routine.
Interval
On flat head systems, clean at every ribbon change; in direct thermal printing, at every label roll change. For our near edge and corner edge printers we recommend intervals that can be many times longer than on our flat head systems, depending on ambient conditions. That is down to the precisely controlled, lower mechanical head pressure and the head lift mechanism fitted as standard. To make the routine stick in practice, it helps to tie it to something that already happens — the ribbon change, the start of a shift, or a fixed daily rhythm.
Agent
High-percentage isopropyl alcohol mixtures are suitable. For practical use they come as pre-soaked disposable cotton swabs, disposable cleaning wipes and pre-filled cleaning pens, which makes dosing easier and avoids fibers. Not suitable: water-based and aggressive cleaning fluids, microfiber cloths, rough or linting cloths, abrasives of any kind, and blades or tools for removing residue. Compressed air directly at the printhead is unsuitable too, because it drives particles and moisture in rather than removing them. For sensors and housing areas, follow the operating manual for the machine, which may say something different.
Technique
Switch the machine off, open the head lever and let the printhead cool down. Then wipe along the heating line with little fluid and light, even pressure — not across it and not in circles. Remove stubborn residue with repeated cleaning passes rather than scraping it off. Let everything dry completely and only then switch the machine back on. While you are there, take a look at the platen roller.
Prerequisite
Anyone cleaning the printhead must be trained in handling the cleaning agent and in operating the machine in line with the operator manual for the printer concerned, for example through a training course. That is not a formality: most mechanical damage happens during well-meant cleaning attempts.
Handling and keeping a spare
A printhead leaves its protected environment only rarely: when it is fitted, when it is removed, and occasionally for a closer visual inspection. Those few minutes account for a surprisingly large share of the damage that later shows up as premature failure. It is worth treating these steps as a small procedure in their own right rather than squeezing them in between two other jobs.
Two rules carry most of the weight. The heating line stays untouched — by fingers as much as by tools. And work is only ever done with the machine switched off: disconnect a connector under power and you risk damage that shows nothing at first and comes back as a white line weeks later. Everything else follows almost by itself. Hold the printhead at the points provided for it, not by the heating line and not by the contacts, and discharge your own body before touching it — ideally using suitable protective equipment, otherwise via a grounded object within reach.
The same thinking applies to a spare printhead in storage, just further ahead in time: original packaging, dry, protected, and the care you would give any electronic component. One detail is easily overlooked — choose a storage location that avoids a significant temperature jump when the head is fitted. A head that travels straight from a cool store into a warm hall brings exactly the condensation risk described above with it.
That leaves the question of whether a spare head on the shelf pays for itself at all. On the balance sheet it ties up capital, and that is a fair argument. Set against it is a labeling line that produces nothing while it is down — and in many processes, nothing ships without identification. Work both sides through once for your critical lines and the answer is usually clear, for precisely the head design and configuration actually in use.
Why failures rarely share a single cause
One point regularly causes confusion during fault-finding: printheads do not always fail for the same reason. Components are subject to manufacturing tolerances, and the load in production fluctuates — with material batches, order mix, season, staff changes and ambient conditions. Two heads in the same machine can therefore show different damage patterns, and the same application can develop different weak points over time.
The practical consequence: hunting for the one cause and working on that alone rarely gets you far. It is more effective to improve every area described here — energy input, consumables, environment, mechanics, cleaning and handling. Every area that is in good order reduces the probability of premature failure, whichever mechanism turns out to be decisive in an individual case.
Conclusion
The service life of a thermal printhead is more predictable than it feels when something goes wrong. Four main reasons lead to failure, and four levers work against them: energy input, consumables, ambient conditions and mechanics. A reliable cleaning routine and careful handling carry those levers through everyday operation. And because loads and component tolerances shift over time, improving every area pays off more than perfecting a single one. Premature failures are, above all, a matter of routines — and routines can be set.
Next step
Not sure why printheads in your application fail sooner than expected? Or would you like to work through your cleaning routine, consumables and settings systematically? Describe your application to us — we will go through the possible causes with you and work out which levers make the biggest difference in your case.
Discuss your application with NOVEXX Solutions
Frequently asked questions
How do I tell whether white streaks come from contamination or from damage?
Clean the printhead thoroughly and run a test print afterwards. If the streak disappears, it was contamination. If it stays in exactly the same place, that area is damaged. With contamination the edge of the white line is usually less sharply defined than with a failed heating element. Also try a fresh ribbon — that shows whether ribbon wrinkle was the cause — and check the platen roller, because a nick in it produces a white line too.
How often should a printhead be cleaned?
On flat head systems at every ribbon change, and in direct thermal printing at every label roll change. On near edge and corner edge printers from NOVEXX Solutions, intervals can be many times longer depending on ambient conditions, because head pressure is precisely controlled and lower and a head lift mechanism is fitted as standard. What counts is consistency: tie cleaning to roll changes, the start of a shift or a fixed daily rhythm.
What should I use to clean a thermal printhead?
High-percentage isopropyl alcohol mixtures, conveniently available as pre-soaked swabs, disposable wipes or cleaning pens. Not suitable: water-based or aggressive cleaners, microfiber, rough or linting cloths, abrasives, blades and compressed air directly at the printhead. Wipe along the heating line with little fluid, let the head cool down first and dry completely afterwards. Training in handling both the agent and the machine is a prerequisite.
Why does a printhead fail after only a short time in service?
Because time in service says nothing about load. What counts is the distance traveled, the energy level set while covering it, the consumables used, the ambient conditions and the cleaning that actually took place. Common patterns are persistently high settings, a ribbon narrower than the label, irregular cleaning and mechanical damage. Usually several of these factors act together.
How should a spare printhead be stored?
In its original packaging, dry and protected, with the care you would give any electronic component. Avoid a storage location that creates a temperature jump with a risk of condensation when the head is fitted. Never touch the heating line when unpacking, discharge your body beforehand, and only fit the head with the machine switched off. Keep the variant that matches your configuration.